Tuesday 11 December 2018

Flings, Fling

Now, I'm not the fastest painter, nor do I claim to be the best. But it would seem that some people like what I do. In this case, so much so that I've gained a new friend, Robin. We met as you sometimes do in the 21st Century, on Facebook after he was selling some old miniatures. Turns out that he also has a love of the old Halfling Blood Bowl team, in particular, the style that I've painted mine. At the time I was look for some Skaven (ratmen) to increase the models I had so that I could start a Skaven team of my own. So in exchange of the Skaven he had, I said I would paint him some Halflings and he'd send me the minis. Though I did warn him, I'm slow, and I paint in waves. 6 months later, I've finally finished. I don't know the team name, I'll add it once Robin has decided, but they are done and posted yesterday. Painted in a style similar to my 'Fondant Fancies', but with something a bit different so they are not just a clone of what I did before. Even the Treemen are painted in 2 different styles, with one just a light brown/sand and a Earthshade wash. Then the other one is also brown/sand base, but with ink washes in 2 different colours.
I hope they bring him years of enjoyment, it was nice to paint the little guys again.


Thursday 2 August 2018

It's All For Charity Mate!

Sometimes I paint stuff not just for myself, but also for a charity auction. This weekend 3/4/5 August in Bognor there will be a Blood Bowl weekend, with auctions and other events going to charity. Its called Thrudball and organised by a chap named Andy and some other guys who's names escape me. But Andy did ask if I'd be happy painting a few models for him, as its for charity I agreed.
First one is a fat Ratman produced by Impact! Miniatures named Glart Smash-n-Rip if you interest in owning one of your own. Lovely sculpt, and very true to the image that I remember from Blood Bowl second edition. So I was looking forward to painting him, though he is made of resin, which so far, I hate painting.

This resin was a bit easier than some I've painted, having washed him soapy water first, and then priming him with Vallejo Air surface primer (70 600). I chose a base colour for him of Elf grey (from my 80's orginal citadel paint collection) and then gave him a wash of Agrax Earthshade and Nuln Oil. These gave him a nice fetted look, more unwashed and unkept Ratman. After this, it was just a mass dry brush of more Elf Grey, simple by effective.


As you can see above, I've added some other details into this mini. First was picking out some flesh on the Ratman, so the toes, palms of hands, tail, scar, mouth, nose, eyes, and ears where painted with Coat d'arms Dwarven Flesh (124) and then washed with Ink Wash Flesh (133). You can follow the link to this and get them from Black Hat Miniatures, where I get all my paints now. After this, the skin was highlighted with some more Dwarven Flesh, and a few touches added round the body to give a hairless feel to some of it. The rest is just dark red, with a light red highlight, white pads and silver items where needed. Anything leather is a dark brown, washed with Agrax, and then highlighted with a ligher brown. Then after a satin varnish, you get your finished Glart.


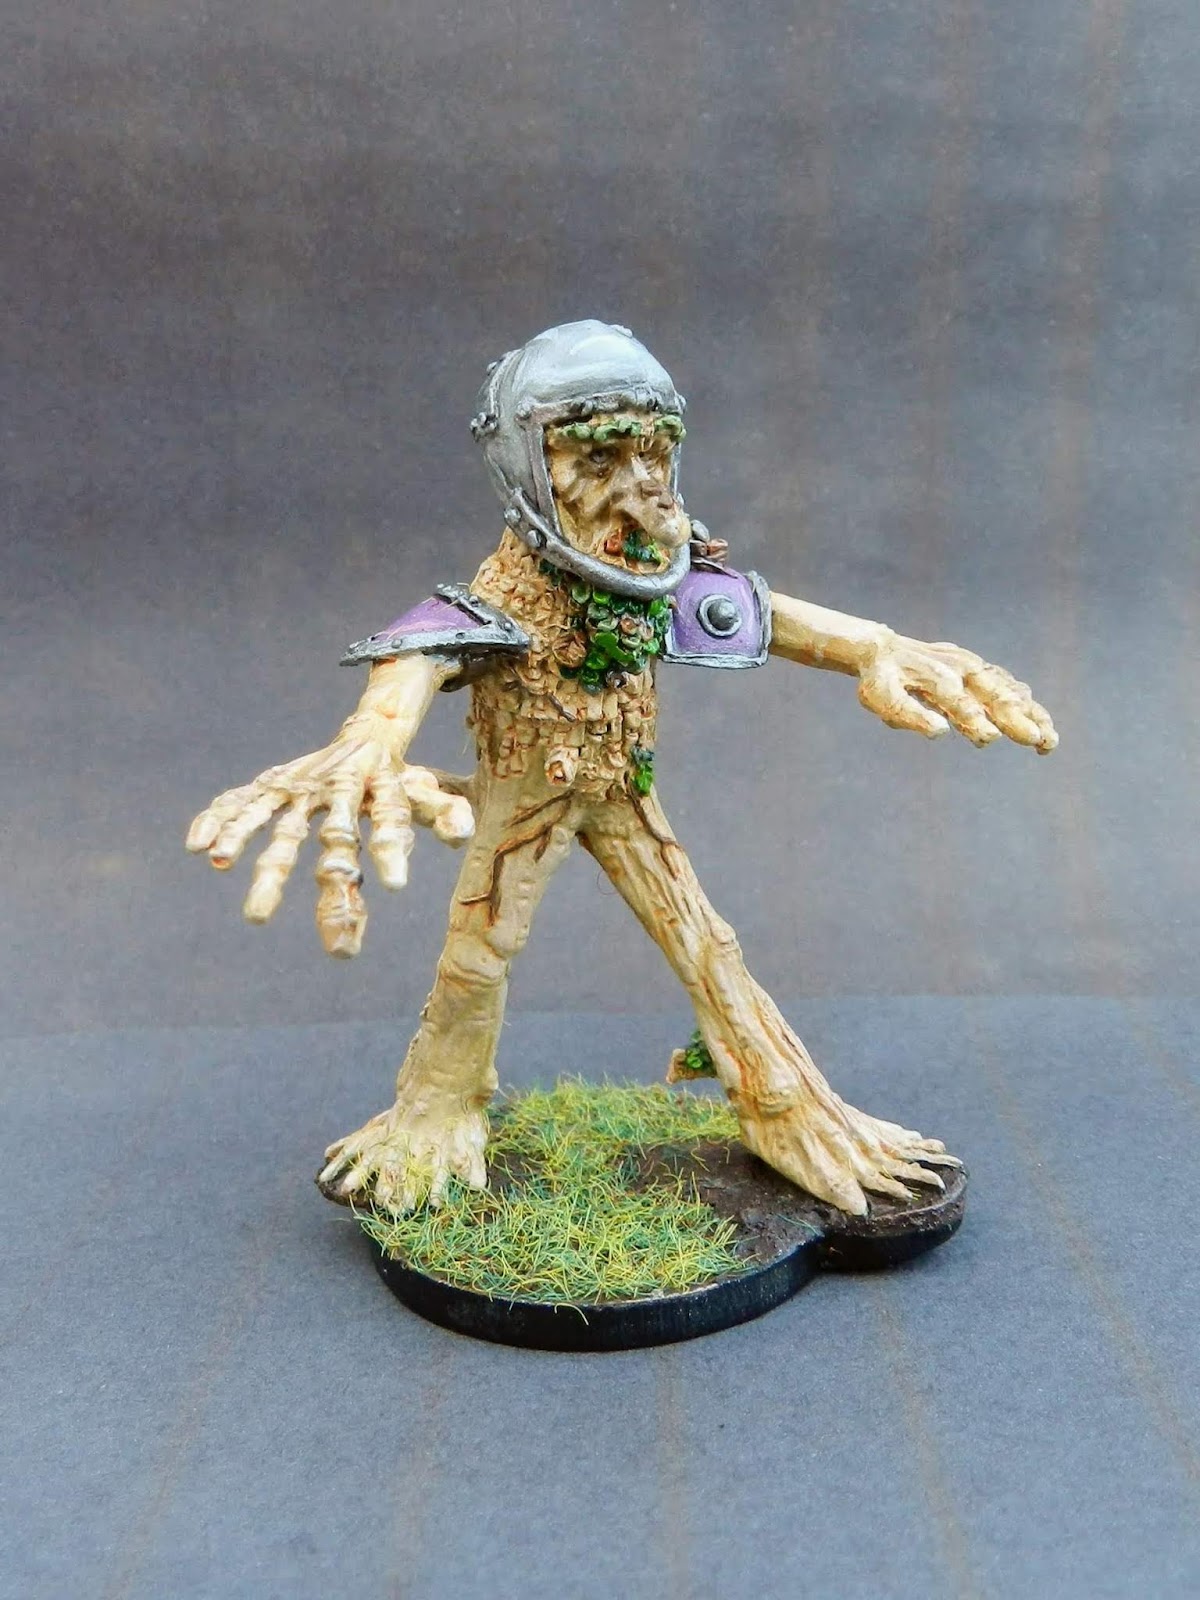
 Along with Glart, I also painted up a Werebear, this chap too was from Impact. Just follow the link if you want to own one of your own.
Again he was washed in soapy water, then based coated with Vallejo white primer. The base colour for him this time was Citadel Dryad Bark, then some tests with 2 highlights. First was Gorthor Brown, but I decided it wasn't strong enough, so followed up with a Ratskin Flesh. But in some areas I didn't think that was strong enough and added Troll Slayer Orange. His armour I wanted to give a bronze look, so this is a base coat of 80s Citadel Shining Gold, then a wash of Biel-Tan Green and Druchii Violet.


Wednesday 18 July 2018

NECROMUNDA!

Last month I got my first Necromunda Van Saar gang painted. Took rather a lot longer than I expected, but there was a reason for that. MAGNETS! As the whole team is able to chop and change their weapons as the gang progressed through the campaign, I had to either paint some more models. Or employ my favourite modification , the power of magnetism. First this meant a bit of drilling and testing with some fit. Things are about to get very image heavy!


So these are the first tests, mixing up the arms and seeing what fits.


 These images are to show all the combinations that one model can now have.


While the mix of arms seems to work very well, the 'dual arm' models are a bit tight, so when they are attached. You need to be very careful not to rub off any paint. I've added extra varnish, but its something that I suspect will wear over time. I've also noticed that if you leave the arms on, sometime the 2 varnished pieces can become a bit tacky. So removing can pull away paint, so I'm storing them with the arm removed as much as possible.
The magnets are 2mm x 2mm N35's from Wish, though I imagine you should be able to get them from most places.

This is a example of the 'dual arm' model with a Lascarbine. You have to try to part the arms a little to get them off without to much rubbing of the original paint job.


 The base scheme I chose was a blue and 'bright green'. I felt this had a nice futuristic influence and tied in nicely with a feel of a group that was exposed to chemicals, radiation and other dangerous elements.
Anyway, enough writing, time for some photos of my Green Spe-iiders (Arachnis Deathicus).


I've had a few questions about the magnets, as mentioned above, they are N35 2mm x 2mm Steel Nd-Fe-B. In my case I got these ones from Wish, but before that I've got them from Amazon, and my local game store.


You can makeout the holes in the shoulders where I've located the magnets. A Pin Vice should easily be enough to cut out the hole, though watch the depth on the arms. 2mm with the tip of drill bit is very close to going through, so take it slow. More so, if your using something like a Dremel. 

With the arms, just a small magnet in the shoulder joint is more than enough. Even the Rad Cannon, in case of the image on the left a 'converted' Long Las, doesn't 'droop. They do as you can see, stick to everything easily. As I don't store them on the models, all mine are in my case attached either side to 1 or 2 pence coins.